

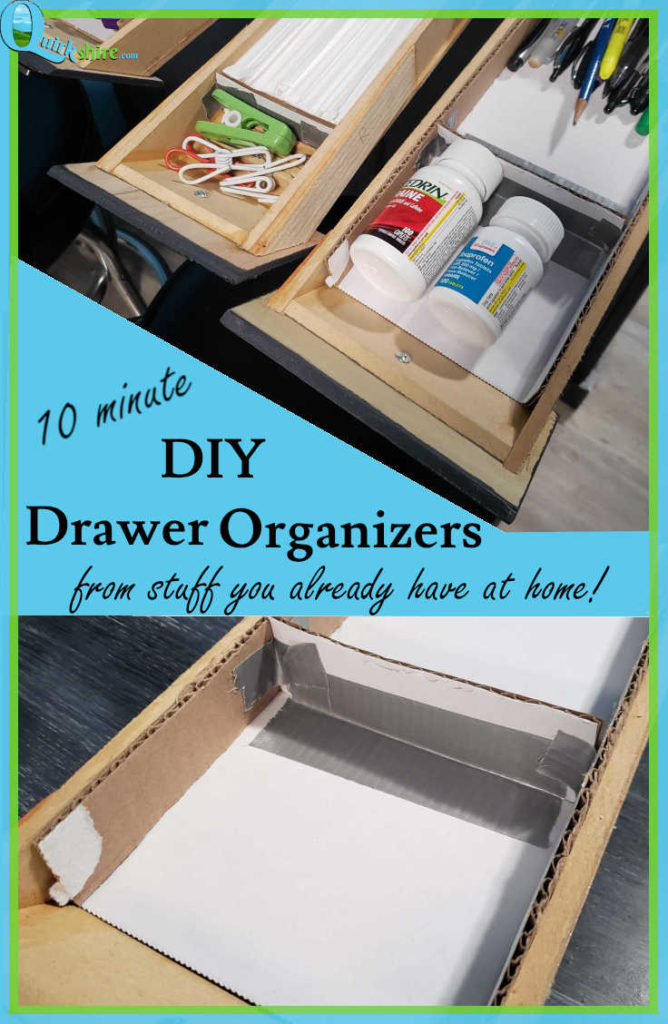
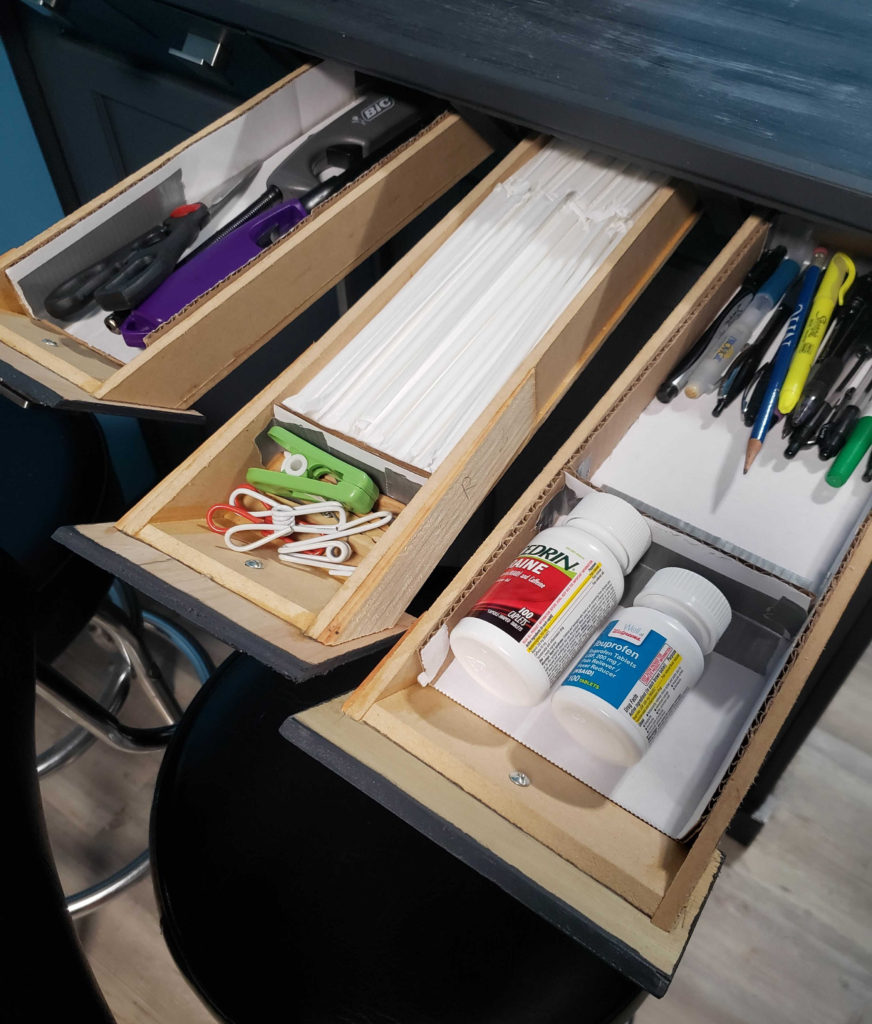
The drawers that we made for our custom breakfast bar are very unique. They’re long and skinny, which gives us quite a bit of storage for small things. The downside is that because they’re so long, things keep sliding towards the back of the drawer! A simple store bought drawer organizer wouldn’t work for these because they won’t fit. Plus, I’m cheap and don’t want to spend money on something that I can easily make! Today I’ll share how I made the drawer organizers so that you can make them too!
Some of the links in this post are affiliate links. If you click the links and make a purchase, I will earn a small commission at no additional cost to you.
Supplies Needed to make your Drawer Organizer:
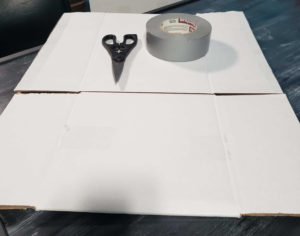
To make your own drawer organizer, you’ll need a cardboard box, a pair of scissors, and some tape. I used duct tape because it was all I had, but you could use clear packing tape or washi tape in a cute print. Some resources for free boxes are retail stores, possibly your work, or the post office. At the post office, they have the flat-rate shipping boxes that you can grab for free. I have seen cheap boxes at the dollar store too, so you could try there if all else fails!
Start Cutting:
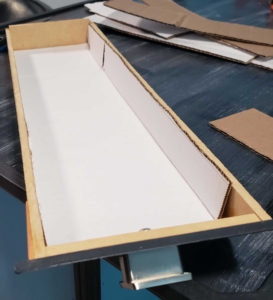
I cut the box so that the fold in the cardboard matched up with the side of my drawer. Then I cut a strip of cardboard that matched the length of the drawer and taped it to the edge of the first piece of cardboard. I didn’t add a piece for the front or back of the drawer because I didn’t feel that it was necessary. You could add these two pieces if you wanted to.
Tape together:
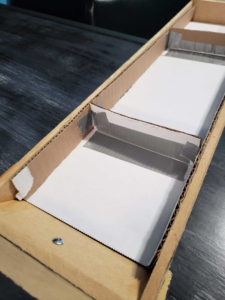
Next, I had to decide what I wanted in each drawer so that I could figure out how big to make each compartment. Then, I cut strips to match the width of the drawer and taped them in place to make the dividers.
Optional – Pretty up your new drawer organizer:
At this point, the drawer organizer is functional, but ugly. There are a few ways to pretty them up. You could use wrapping paper, washi tape, colored duct tape, or spray paint to make them look nice. I was in a hurry and didn’t have any of that stuff on hand, so I just put my stuff in the drawers and called it done.

So there you have it – a super quick, easy and cheap/free way to organize oddly shaped drawers! This simple fix really helps keep things in place in the drawers. No more sifting through a mess at the back of the super long drawer!
I am thinking to do this with my sock and undies drawers too. I found these lovely organizers which are reasonably priced, but I don’t think they will fit the dimensions of my drawers. If I make my own organizers for these drawers, I will probably take the time to make them pretty!
What do you think? Do you have a drawer at home that needs a custom drawer organizer? Share below! I’d love to see your projects that were inspired from this post!