

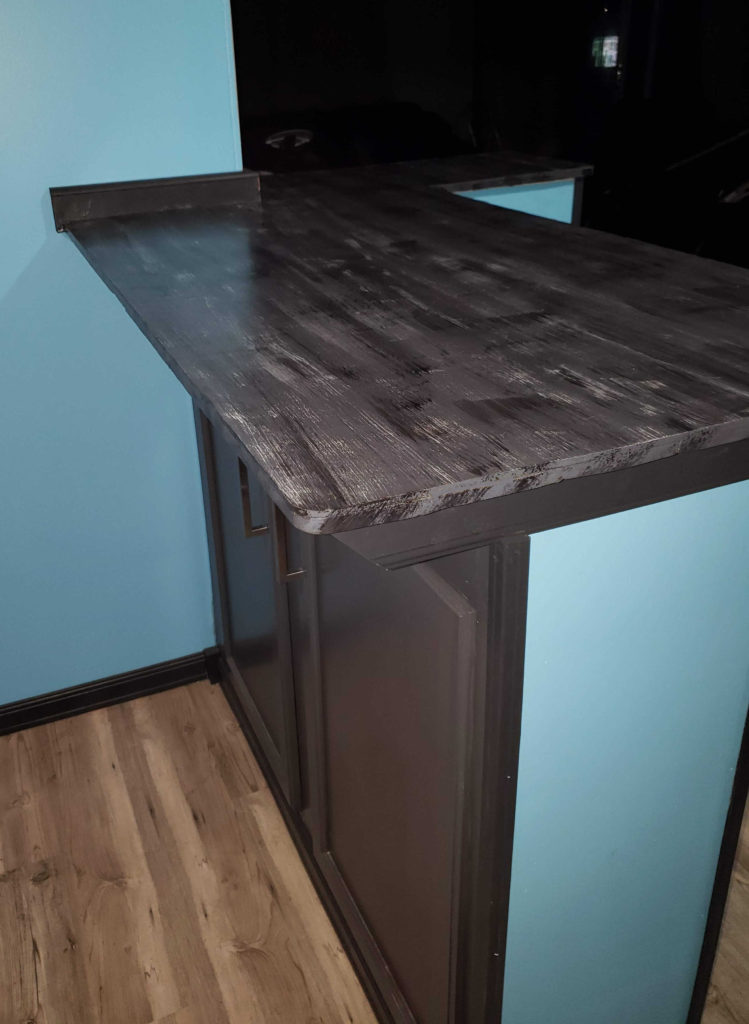
Lately, the hubby and I have been giving our kitchen some much needed TLC. In addition to the typical paint makeover, we wanted to add some extra functionality that our kitchen has been missing. We began this makeover by creating a half wall (see that project here) and then building a breakfast bar against it. We shopped around the pre-made breakfast bars and quickly discovered that they weren’t for us. The pre-made breakfast bars are crazy expensive! Plus, they were too big to fit the small space that we had to work with anyway. So we did what any crazy homeowner does, and built our own custom breakfast bar!
Some of the links in this post are affiliate links. If you click the links and make a purchase, I will earn a small commission at no additional cost to you.
Decide on a look for the bar
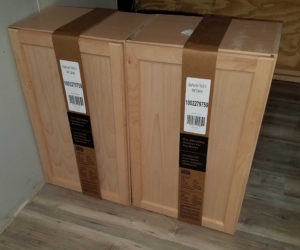
Our first idea was to use lumber and build the bar like a “tall table” with no storage. This idea quickly changed into a more functional piece during a trip to the hardware store! While we were there pricing out lumber, we stumbled upon some pre-made cabinets and decided to use these instead. This was a very cost-effective solution and an awesome way to add some much-needed storage space!
We had a rough idea on the size we wanted: around 4 feet long and 18 inches wide, to seat 4 people. When we found these 18 inch cabinets, we thought that they would be perfect (and cheap)! We used wall cabinets and build a frame to set them on because the base cabinets would be too deep. The wall cabinets at 12 inches deep were the perfect size to allow for an overhang of the bar top. To build the bar frame, we used these two cabinets and five 2x3x8 lumber. For the bar top, we used four premium 2x8x10. Add in a couple cans of stain for the bar top, and the whole project cost us about $150. We were super happy with the low cost of having a custom bar!
Build the bottom frame of the bar
First, we decided how long we wanted the bar to be and where exactly we wanted it to sit. Then, hubby cut some 2x3s to size to build the bottom of the bar frame. This base frame mimicked the toe kick and height of normal base cabinet. Plus, it allowed the doors to open without dragging the floor. The frame was super easy to make – simply cut two long boards and two short boards to the size that you want your bar to be. We kept the 12 inch width to match the cabinets and added some space in between and on the outsides of the cabinets. Once the frame is cut to size, screw it together at the corners where the boards meet. Then, be sure to anchor the frame to the wall.

Add vertical posts to the frame
Next, we added a small piece of plywood for the cabinets to sit on. We also added the boards that will go vertical, next to the cabinets. For more support, hubby used dowel pegs inserted into the frame and board along with liquid nails. We didn’t have screws long enough to go through the 2×3 and the vertical board, so this was the next best option. This part was a bit tricky because we had to make sure that the board was perfectly still and pressed into place while it dried. We used a bunch of clamps to accomplish this. This process was repeated for both cabinets, so that there were a total of 6 posts: 4 at each side and 2 in the middle.


Above left: you can see the piece of plywood that the cabinets sit on. The little pegs sticking out of the frame are where the boards sit. Hubby made holes in the board that match up to the pegs.
Above right: the cabinet was placed on the plywood and vertical boards placed and glued. We then added lots of clamps to keep it still while it dried. In this picture, there are a total of 4 posts in place: one at each corner.
Add horizontal posts to complete the bar frame
We then added two long boards to the top of the frame and screwed them into place. This gave stability to the frame and helped it hold the cabinets in place better. We also added a short piece of wood between the two long boards to give us something to anchor the frame to the wall.

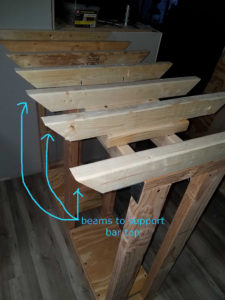
Add bar top support beams
We wanted the bar top to be made out of several 2×8 boards, but this created a challenge for stability. The top needed to have enough support be sturdy but not get in the way when you sitting at the bar. Hubby came up with this nifty support beam system which worked out very well. He cut several boards to 15 inches so that they would support all of the boards but not show too much. He also cut them at 45° angles to help hide them and keep them out of the way. We placed them every few inches, so that they were equally(ish) spaced.
Put the bar top on!
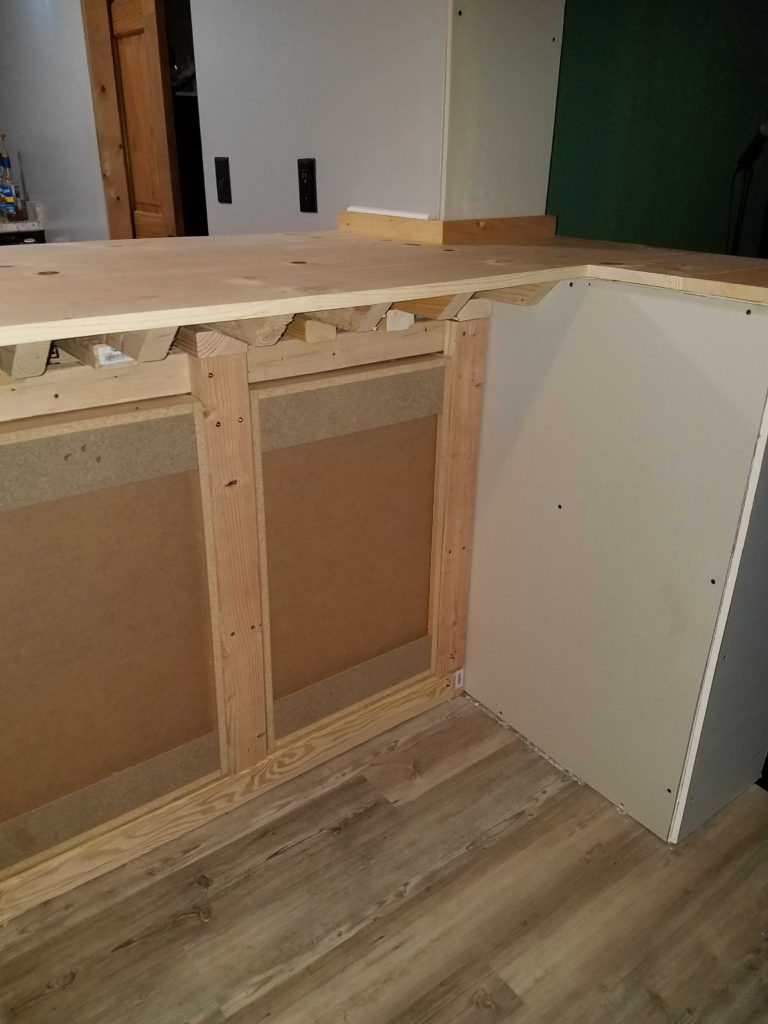
Now for the exciting part – it was finally time to put the boards on the frame that would serve as the bar top! We splurged and bought the premium 2x8s for this part because we wanted a good grain to stain. Measuring and cutting took some time. Some of the planks would be covering both the bar and the half wall, which added some difficulty to the planning of the layout. Hubby opted to do them one at a time to prevent any boo-boos. So, he measured (twice!), cut the board, then put it into place and moved on to the next board until the whole top was done. He then added a small 1×4 to the top against the wall to trim it.

Below left: the front of the bar. Below right: the back of the bar with the new half wall. It just needs some thin plywood to dress it out, then some paint and trim to pretty it up!

Add the finishing touches
We added a thin piece of plywood to cover the cabinet backs and a couple of thin boards to the front to finish the frame above the cabinets. Then, it was finally time to paint the bar and half wall! We opted to paint the back of the bar blue to match the kitchen wall color and the front of the cabinets dark gray to match the rest of the cabinets. The trim color used matches the trim throughout the kitchen, so it all ties together nicely.
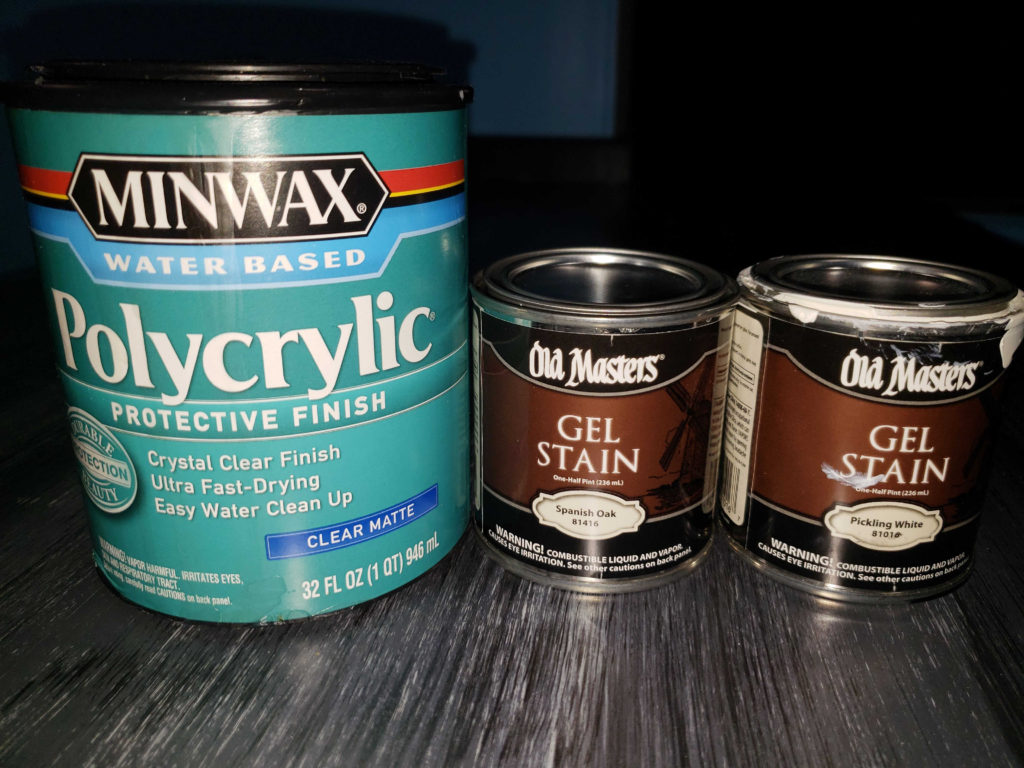
Staining the bar top
The staining process was a whole lot of trial and error. In the end, we used 2 gel stains and had 3 different colors on the bar top. After shopping around, we chose Old Master’s brand gel stain in Spanish Oak (which is almost black), and Pickling White. I used Minwax Polycrylic in matte finish to seal the bar top.
We mixed together the ebony and white stains to make gray to use as a base color. This gray color was applied evenly to the whole bar top (seen in the left picture below). I used a rag to wipe it on, let it soak for about 20 minutes, and then wiped it off with a clean rag. Then, I took a dry 3 inch paint brush dipped in the ebony stain to create the black streaks. I wiped the stain with the grain in some spots, but not everywhere which created different effects. Next, I used a 2 inch dry paint brush dipped in the white stain to create the white streaks and left it there. This technique created the black and white streaks.

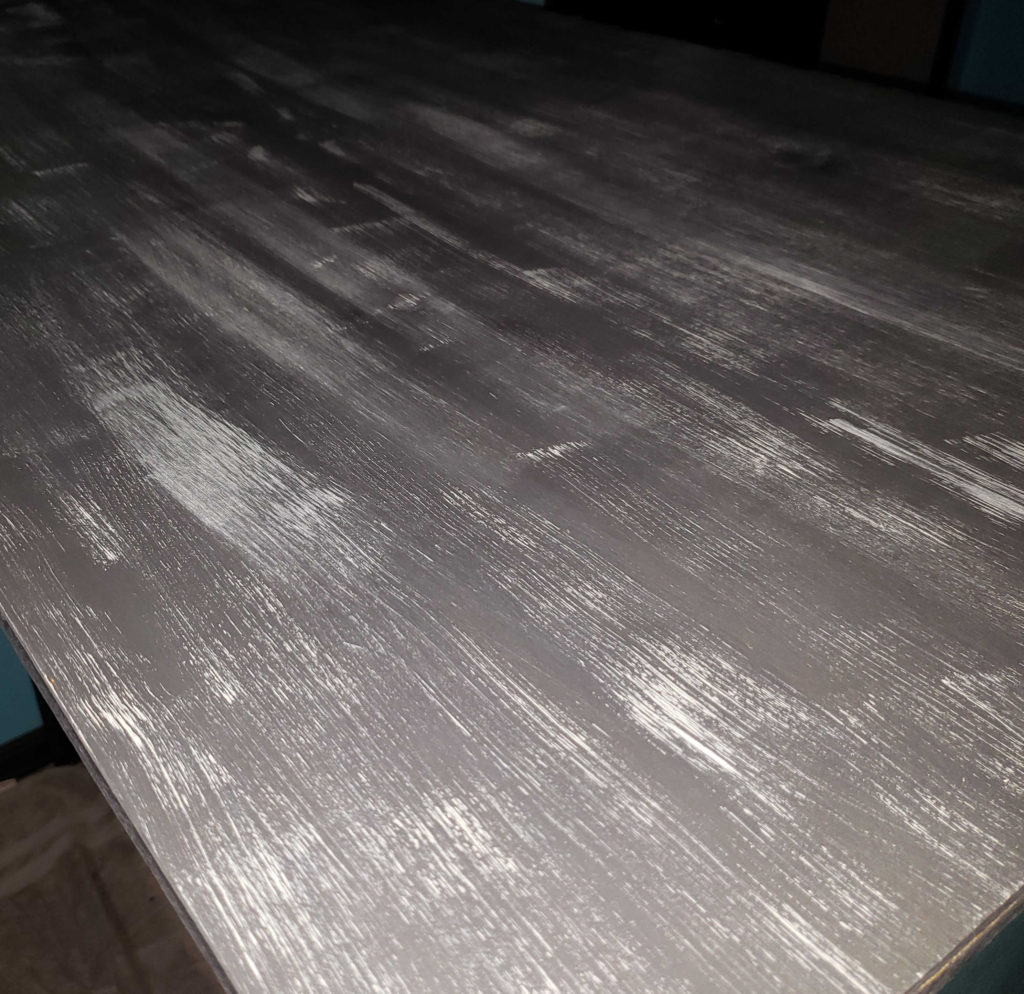
The staining process took several days because I had to wait for the stain to dry completely before moving on to the next step. I sealed the bar top with polycrilic in a matte finish. I ended up applying 5 coats, lightly sanding between each coat. We are very happy with the look of it!

If you’re curious about the half wall seen in the final pictures, check out this post that shows how we made it!
We added trim to the bar top to give it a nice custom, finished look. Check out this post for all the details on that project!
How do you like our final product? Have you done your own kitchen makeovers? I’d love to hear about them!